BSK49

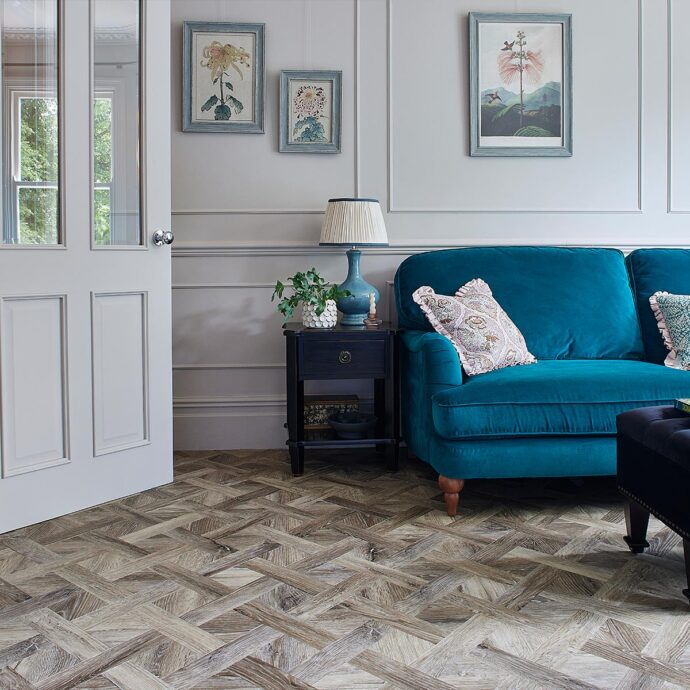
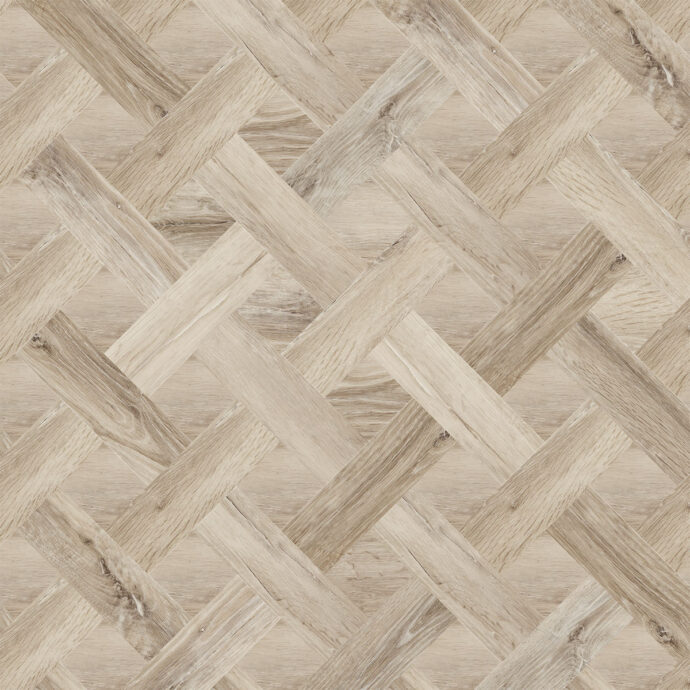
Blonde Oak Basket Weave

Blonde Oak is a stunning LVT (Luxury Vinyl Tile) featuring a classic basket weave pattern reminiscent of traditional carpentry techniques. Each plank is meticulously crafted to mimic the timeless beauty of oak wood, offering a blend of rustic charm and modern durability. With its intricate design and rich texture, Blonde Oak LVT brings warmth and character to any space.

Range:

CREO

Style:

Basket Weave, Wood

Installation:

Glue Down

Edge:

Bevel

Colour:

Medium

Type:

LVT Flooring

Download our brochure

View our latest brochure, download the full PDF or order a copy to your home.
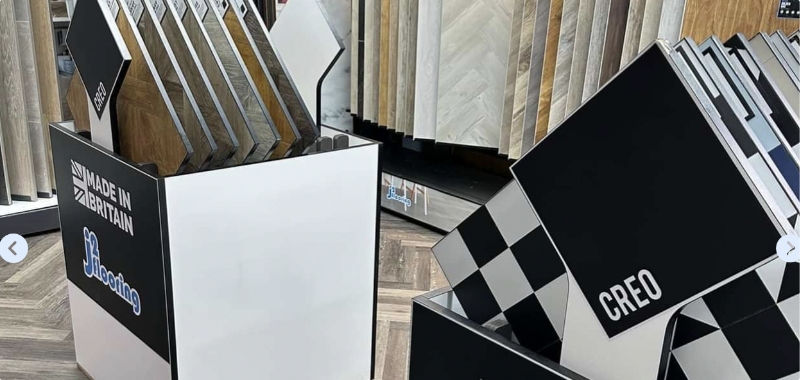
Buy direct from a retailer

We have trusted retail partners across the UK where you will get all the expert help you need to make the process easy and exciting.

Stylish floors, designed for living

WATERPROOF

PET FRIENDLY

UNDERFLOOR HEATING COMPATIBLE

CHILD PROOF

WARMER UNDER FOOT

QUIETER TO WALK ON

EASY TO CLEAN + MAINTAIN

ENVIRONMENTALLY FRIENDLY

Installation

Glue Down

Style

Basket Weave, Wood

Edge

Bevel

Type

LVT Flooring

Range

CREO

Wear Layer

0.55mm

Thickness

2.5mm

Colour

Medium

Panel Size

Various

J2 Flooring Installation Guidelines for Glue Down LVT Flooring

J2 (LVT) Design Flooring should be installed in accordance with national guidelines and codes of practise for the installation of resilient floor coverings.

National Standards – United Kingdom BS 8203

Failure to follow these guidelines, national standards and codes of practise may result in any such warranties being void.

Pre-Installation Checks:

  • Check the product code/name and quantities corresponds to the job order
  • Products must be from one batch code
  • Check for any potential defects or damage prior to installation.
  • Any complaints or claims regarding clear visible defects will be void after installation
  • Flooring works should not commence until all other trades have completed their works.


Storage & Acclimatisation:

  • J2 LVT MUST be acclimatised for a minimum of 24 – 48 hours pre installation Acclimatisation occurs when the product is removed from its packaging and allowed to condition (air through) in an area with a temperature of 18 – 27 degrees
  • During and 24 hours post installation the room temperature must be kept at a constant temperature (ideally 18-20 degrees) fluctuations of temperature +/- 2 degrees will change the dimensional structure of the floor covering, this why it is paramount to maintain a constant temperature throughout the installation process.
  • Product must be laid flat and stacked no higher than 4 boxes high.
  • Exposure to direct sunlight and placement of product against any heat source must be avoided during the acclimatisation process.


Under Floor Heating:

  • J2 LVT can be installed over under floor heating systems.
  • These systems must contain a cut off temperature to ensure the back of the LVT (adhesive line) does not exceed 27 degrees.
  • All under floor heating systems must be fully commissioned in accordance with the manufacturers protocol
  • Under floor heating systems must be switched off 48 hours prior, during and 48 hours post installation (an alternative form of heating must be in situ throughout this process to ensure the required temperature of 18-27 degrees is maintained.)
  • Following post 48 hour installation the Under floor heating system can be restarted at an ambient temperature and increased by 2 degrees a day until the maximum temperature of 27 degrees is sustained.
  • For electrical under floor heating, contact the heating system manufacturer to check that the system in question is compatible with the LVT flooring and what methods are required for installation
  • Care must be taken to ensure thermally induced damage is not caused to the LVT flooring by creating localised ‘hot spots/thermal block’. Placement of rugs and furniture which may prevent thermal conduction must be considered to avoid such an issue. This can cause discoloration of the LVT along with element burn out if electric under floor heating is installed.

Sub-Floor Preparation:

  • The quality of any J2 LVT floor covering is very much dependant on the standard of the sub-floor preparation achieved
  • Sub-floor preparation must be accordance with the relevant national standard and codes of practise for the installation of resilient floor coverings (BS 8203)
  • The sub-floor must be firm, hard, flat, smooth, dry, clean and dust free. The sub- floor should be prepared dependant on what sub-floor type is in situ. (contact your sub-floor preparation provider for advise and recommendations on product selection in conjunction with the different sub floor types.)
  • J2 LVT requires a surface regularity of SR1, this is where the floor must not deviate above 3mm over a 2mm distance when tested with a slip gauge (BS 8203)
  • Any such deviation above 3mm will telegraph through the LVT floor covering causing unsightly deflections especially in areas subject to high levels of natural light. Along with this, any LVT design floor can be affected as any discrepancy within the sub floor will displace and offset any design floor installation.
  • When installing J2 LVT to a solid sub floor, a minimum of 3mm smoothing compound must be applied to the sub-floor prior to installation of the LVT
  • When installing plywood panels to a timber sub-floor always ensure any loose boards are well secured and any worn, broken boards replaced. The minimum thickness of plywood must be 5.5mm nominal, fixings should be applied at a maximum of 150mm to the centre of the board and 100mm around the perimeter, 12mm from the edge. Always apply fixings from the centre outwards, this prevents air entrapment which can lead to expansion of the board
  • Plywood joints and fixing points should be filled and skimmed over with a suitable skim coat, alternatively, prime the plywood with an appropriate primer and apply a minimum of 3mm flexible smoothing compound. (contact your underlayment provider for further info)
  • J2 Flooring will only accept the use of plywood panels in accordance with the national standards BS 8203:2017 Annex A. The plywood should be of classification EN 636-2 with a class 3 glue bond EN 314-2
  • Wood mosaic panel, wood block, wood strip, laminate, click products and existing LVT must be removed along with any underlayment applied. The sub-floor should be then assessed and treated accordingly.
  • Any potential bond weakening products/materials/applications (paint, PVA, latency, silicone based hardener, chemical curing agents etc..) must be fully abraded and removed from the sub floor, these will lead to bonding issues and future failure of the installation if overlayed.

Sub-Floor Moisture:

  • Moisture of the base sub-floor must be measured and documented in accordance to national standards and codes of practise. (BS 8203)
  • J2 LVT should only be laid on sub-floors which DO NOT suffer from rising damp or subject to hydrostatic pressure.
  • J2 LVT is not suitable for exterior applications or for areas subject to the continuous use of water (wet rooms etc.) the floorcovering can be installed in bathrooms, kitchens, utility rooms etc where large amounts of water won’t be an issue.
  • Moisture levels within a cementitious base floor where a hygrometer test is specified must not exceed 75% RH (Relative Humidity)
  • Moisture levels where the Carbide Method test is specified must not exceed 2% CM for cementitious floors and 0.5% for calcium sulphate screeds
  • For any sub-floor resulting in levels above these parameters then a suitable damp proof membrane must be used. (contact your local preparation provider for recommended products and further information)
  • Be aware that in certain environments due to a clinical nature, the PH levels of the slab may need to be controlled (contact our technical team for further information)
  • When installing timber sheets (plywood) on a timber sub-floor, the moisture content of both the sub-floor and plywood must be within +/- 2% equilibrium when tested with an electrical resistance meter. Results outside of this scope will require the timber sheets to be acclimatised until equilibrium is achieved otherwise expansion/contraction will occur within the timber board as it gains or loses moisture, this will lead to unsightly plywood lines telegraphing through the lvt floor following installation.

LVT Installation:

  • The optimum appearance can be produced by carefully planning and setting out planks/tiles
  • Dry laying the product can be helpful to determine whether the positioning of cuts and pattern is acceptable. This can include cuts against the walls or around door architraves where the largest cut possible is essential. (ideally greater than half a tile/plank size)
  • LVT planks ideally need to be a minimum of 150mm when cut against the wall on the length of any area. (smaller cuts can be unsightly and can have a lesser bond due the smaller surface area.)
  • Care should be taken to ensure plank products with arrows on the reverse side are laid in the same direction during installation and laid alternative (checker board pattern) when installing tile designs. This is due the shading aspect when the material is cut during the manufacturing process. If installed randomly this can effect the aesthetic look of the floor due to different shading and gloss levels especially in areas subject to natural light, this can be exaggerated.
  • Traditionally the starting point of LVT installations is the centre of any area/room to ensure equal cuts are achieved around the perimeter. Alternatively a point of interest may be chosen as a centre focal point (fire place, bay window, kitchen island etc) Options should be discussed between installer and end user to confirm starting point.
  • LVT planks should be laid in random/staggered formation with header joints between adjoining planks being no closer than 150mm, the ladder effect must be avoided when installing the planks across the designated area.
  • Pattern repeats are present with LVT flooring. Fully randomise and replace any coinciding patterns between adjoining planks. If similar shades and patterns of LVT are installed within an area this can create colour spots within the installation, these can be detrimental to the desired finish of the floorcovering. Care should be taken when installing the LVT to make sure the random pattern and colour of the design is laid to create that natural looking floor.
  • Working from the centre or starting point, apply the appropriate adhesive for site conditions (manufacturers guidelines must be followed) If any area is likely to suffer from potential climate changes then we would advise a wet set high temperature adhesive is used.
  • Please check the data sheet for recommended adhesives. Always ensure the correct type of adhesive is used for the environment it is being installed, specifically areas subject to varying high and low temperatures.
  • Only apply the amount of adhesive required to ensure the flooring is laid within the adhesives open time. The correct notched trowel with no blocked V’s should be used at all times. See the side of the adhesive tub or data sheets for further information.
  • Once LVT has been laid into the adhesive then apply gentle pressure with a hand roller ensuring no displacement occurs, then thoroughly roll the floor with a 68kg roller. There must be full transfer of adhesive on both the sub floor and reverse side of the lvt
  • The adhesive ridges must be flattened, if this is not possible then late placement of the LVT has occurred which will lead to potential failure of the installation due to weak bond strength, the floor covering will potentially start gapping due this lack of stability.
  • In areas subject to solar gain, high temperatures and/or high spillage then a 2 part chemical cure or 1 part moisture curing adhesive must be used (seek adhesive manufacturers guidance)
  • Following placement of lvt into adhesive, ensure any excess or seepage of adhesive is immediately removed with a damp cloth, be careful not to spread the adhesive further when wiped.
  • J2 Design Flooring LVT does not require an expansion gap and should be fitted as tight and neat as possible to any permanent fixtures.
  • Upon completion of the installation, fully roll the floor with a 68kg roller and remove any adhesive or dirt marks from the floor covering.
  • J2 Flooring will not be liable for any losses, damage or complaints that may arise due to incorrect methods applied during any of the installation procedures. All manufacturers guidelines and standards must be strictly followed.

Maintenance:

  • The use of non-staining entrance matting is recommended for placement at any exterior entrance way, this will help protect the floor against any debris, water from potentially damaging the floor covering.
  • It is recommended that soft felt pads or cups are applied to any furniture that is likely to be moved, table legs and chairs for example.
  • When moving any furniture, avoid pushing or pulling objects across the floor covering
  • Regularly sweep the floor with a soft brush, this will prevent any fine grit build up which can be abrasive to the floor covering and cause permanent damage.
  • The use of vacuums with beater bars are NOT recommended, if vacuuming the floor then ensure the brushes are applied to the floor with no signs of grit/debris in amongst the bristles. The vacuum must be on a low suction power.
  • When cleaning the LVT floor a PH neutral cleaner must be used (Dr Schutz are our recommended brand for use with our floors) Household detergents and bleach cleaners must never be used, this can lead to residue build up leading to slip issues along with discolouration of the floor covering.
  • Avoid over spray when using silicone based products such as polishes and some air fresheners, this will lead to slipping issues.
  • Always remove spillages with a damp cloth/mop to avoid any potential staining issues.

You can also download these LVT Installation guidelines here.

Rustic Textures & Rustic Textures Parquet Collection (Covering RT, ST & RTP Codes)

12 Year Residential Guarantee

7 Year Commercial*

Natural Timbers & Natural Timbers Parquet Collection (Covering NT, HC and NTP codes)

Lifetime Residential Guarantee

10 Year Commercial Guarantee*

ZEEZOO® SPC Rigid Core

Lifetime Residential Guarantee

7 Year Commercial Guarantee*

CUBE® SPC Rigid Core

Lifetime Residential Guarantee

10 Year Commercial Guarantee*

J2 Flooring offers a ‘wear guarantee’ on all of our first quality LVT and SPC floors to the purchaser against wearing out for the specific range and period above, providing the floor was installed correctly and maintained properly, using J2 Flooring approved cleaning and maintenance products and used as intended.

Wearing out is defined as the surface wear layer being worn out,resulting in the pattern / colour being removed from normal traffic. In the event of the wear layer wearing out within the warranty time frame, from the date of installation, J2 Flooring will replace the flooring product only. Our products are also guaranteed against any manufacturing defects, which would be visible and present before and during installation.

Our guarantee does not cover installation errors or incorrect maintenance, wear out from the following is also not included:

  1. Accidental damage or misuse causing Stains, scratches, indentations, scuffs
  2. Discolouration from excessive moisture, ie. leaks, incorrect cleaning solutions.
  3. Incorrect adhesive use or application. 
  4. Incorrect preparation materials or defects caused by preparation materials 
  5. Installation errors resulting in the floor to fail as a result.

We strongly advise all purchasers of J2 Flooring products also purchase a recognised LVT / SPC cleaning and maintenance solutions to withhold the guarantee. Please speak to your supplier regarding this or use Dr Schutz cleaning and maintenance products.

For additional information or advice, please consult your supplier.

*as commercial usage can vary, to ensure our product will be covered for the intended usage, please contact us. In some instances commercial warranty on wear will be increased from the specified time above, or reduced dependent on the application.

Find your local retailer